So you’ve bought your hosting and set up your business email, and you’re all ready to start sending and receiving emails from your company account, through the CPanel or Plesk email that you’ve set up directly from the web hosting. However, you’ll soon realise that using webmail isn’t the easiest or the smoothest of experiences, after years of being used to the high quality browsing convenience of your personal Gmail account.
The simple solution is to just sign up for Google Workspaces (formerly Google Suite), and have a premium Gmail business account for just SGD8 a month, per user. You can even set up aliases for free – eg contact@oangle.com is an alias email at Oangle, set up for free, and certain users in Oangle are authorised to use ‘contact@oangle.com’ to send out emails, and they can receive emails sent to ‘contact@oangle.com’.
However, you may feel that your business is not yet established, and since the web hosting already provides default email service (through CPanel or Plesk), you do not need to spend the extra money. In that case, a simple solution is to point your business email to your personal Gmail, so that you can send and receive emails from your usual Gmail interface.
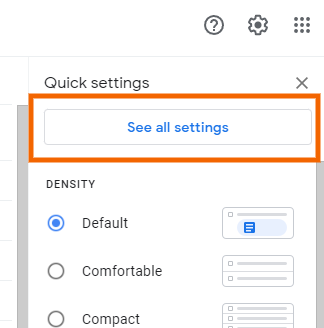
Step 1: On your Gmail account, go to Settings via the top right gear button, and click on ‘See all settings’.
Step 2: From the horizontal menu, click on ‘Accounts and Imports’, and scroll down to ‘Send mail as’.
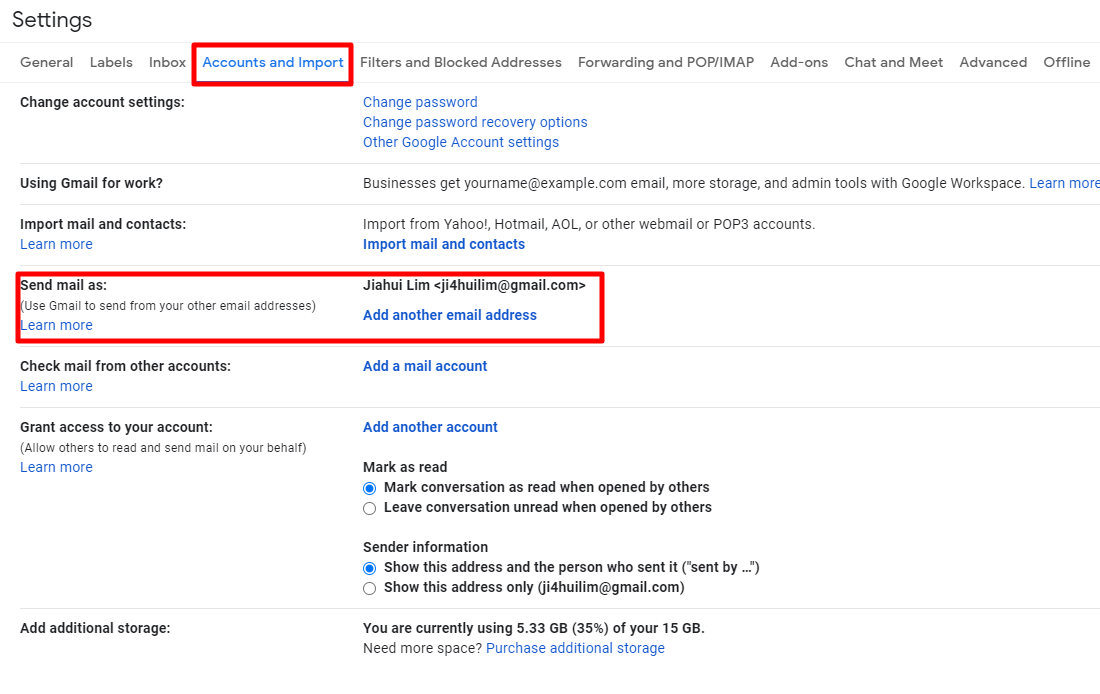
You’ll need to set up for ‘Send mail as’ and ‘Check mail from other accounts’ in order to use your work mail in your personal gmail account smoothly. We’ll go through this one by one.
Step 3: Click on ‘Add another email address’ to add your work email address.

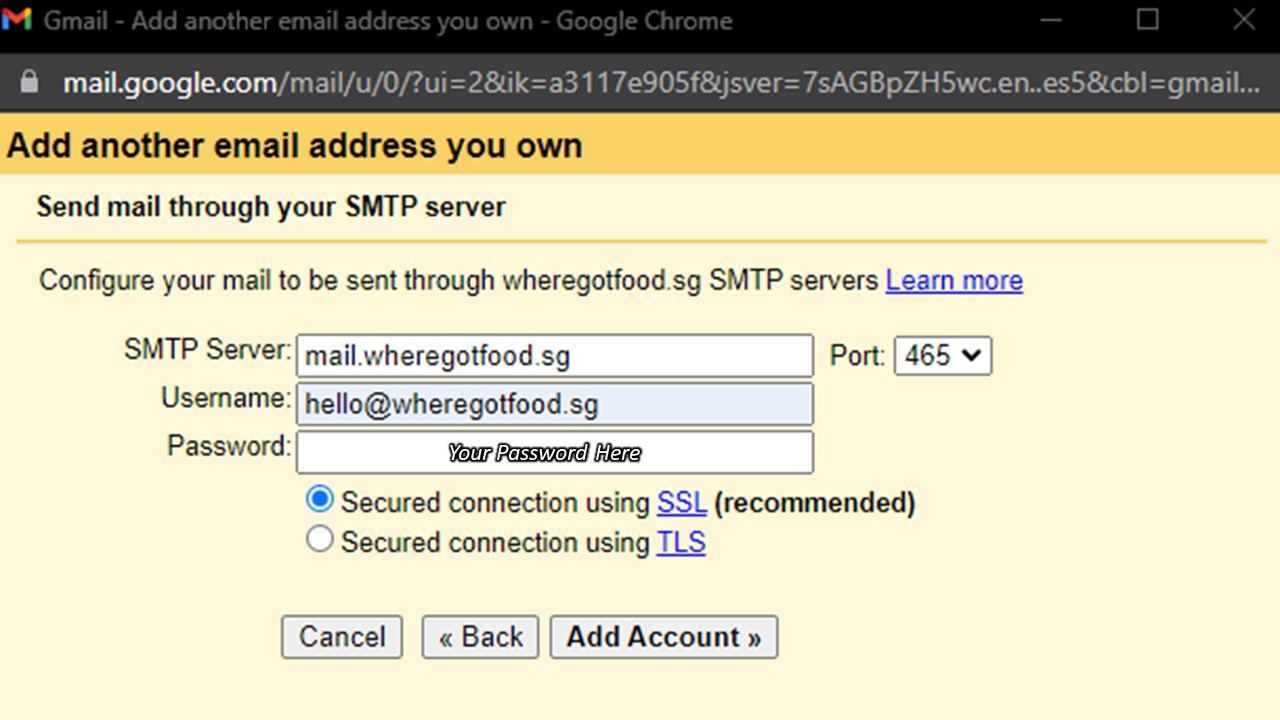
Fields:
(i) Name: Sender Name that recipients will see when you send out email
(ii) Email Address: Your email address
(iii) SMTP Server: Your outgoing mail server
(iv) Username: your email address
(v) Password: your updated email password
(vi) Secured connection using SSL, Port 465 (Please try this first. If you’re unable to connect via SSL, then use TLS, with port: 587).
You should now be able to send out emails from your work email via your gmail. Just make sure to change the email sender field when you send out emails.

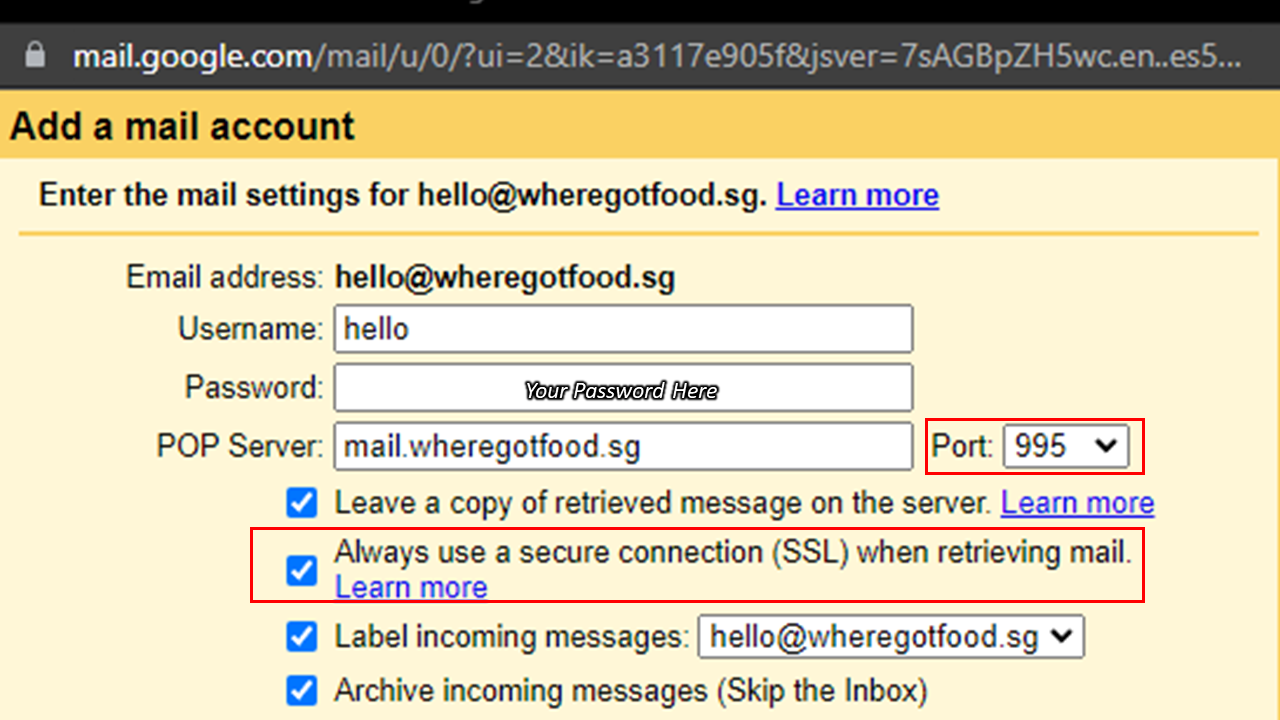
Step 4: Back in Accounts and Import Tab, go to ‘Check mail from other accounts’ to update your settings so that you will be able to receive emails from your work email address in your gmail normally.
Click on ‘Add a mail account’.
The fields are similar as those in point Step 3, except:
(i) POP server
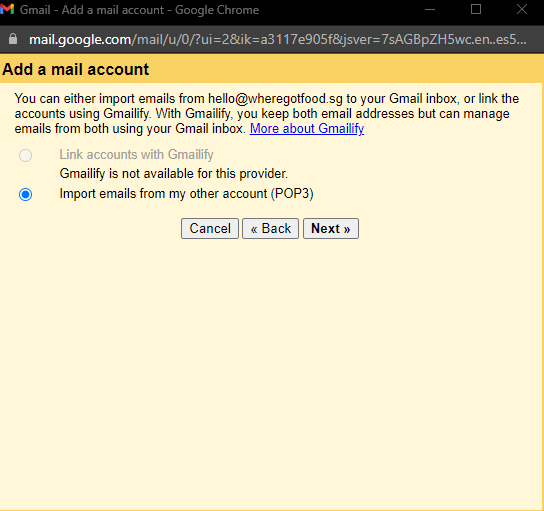
(ii) Port is 995. If port 995 doesn’t work, you can try port 110. Please check ‘Always use a secure connection(SSL) when retrieving mail’ if you are using port 995. If port 110, uncheck it.

You’re now able to send and receive work emails from your personal email address. Do try it out and see if you receive any errors. If you’ve changed your work email password or server, you’ll likely see an error like this:

In this case, please go back to your CPanel or email server and get the updated credentials, and go through steps 3 and 4 again.
Unsure of where to insert this? Don’t want to break anything? Our team of WordPress developers in Singapore can accomplish this job for you safely and efficiently. We are highly experienced in WordPress and web development and are equipped in solving any issues you might be facing.


